
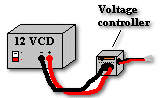
Many times in our labs we need a device to control voltages at different levels. In this article I will explain a circuit capable of controlling the voltage of a 12-volt power supply to any wished voltage point between the range. This is a very useful tool for most things we build in our labs.
The circuit
This circuit consists of one of the most simple semiconductor devices there are: the transistor. Using the all-purpose 3906 PNP transistor, a resistor and a potentiometer, I've made a simple device capable of controlling voltage in a 0 to 12v range.
Looking at figure 1-1, the potentiometer P1 we see is the controller driver. It is the device that actually controls the function of the circuit. Because the transistor is a PNP type, it needs a negative current in the base in order to conduct from emmiter to collector. The potentiometer is the one that provides and limits the current flowing through the base. This current goes trough R1 that limits the current flow so that the transistor does not get damaged when the potentiometer is at its lowest resistance. The transistor Q1, basically the controller of the output, controls the current flow from emmiter to collector depending in the amount of negative current in the base. When P1 is at its lowest resistance Q1 is at its saturation point and will conduct around 12 volts. But when P1 its at its highest resistance, Q1 will conduct little or no current trough the collector. The transistor Q1 will always conduct depending on the position of the potentiometer. The output of the circuit is taken from the ground and from the collector that is the cotrolled output power. Those two points is where one connects the load to complete the circuit. Once the circuit is completed with the load, the current starts to flow.

The PC board
This fairly simple project does not even need a PC board to work properly. Even though it does not need a PC board, I have designed a small PC board that will not take more than a square inch in area. You can build this PC board or design your own it doesn't really matter. If you are experienced in building boards, you may want to build this project on a board. It will look cleaner, neater, and more presentable. Projects on boards look better.

Power supply and working conditions
This circuit is very useful for low current consumption devices. But there are cases that we need higher currents to make a circuit work properly. In this cases this device will not work. The transistor could get damaged at high current.
This circuit was designed to work with 12 volts or less and with a current of arround 300mA or less. If you try to use the circuit with higher ranges, it is likely that the load device won't work propertly and/or damage can occur to the transistor of the controller. To make the circuit work at higher ranges you can change the 3906 for a power transistor. In this case I would use the TIP 41 PNP, and I would rise the value and wattage of R1 to 10K at 1/2 of watt. This way the rating voltage value will rise up to around 30 volts and it will be able to handle up to 1 Amp of current.
For this simple device, I have also designed the perfect power supply. It is a simple 12-volt full wave rectified supply with a current of 500 mA. Here it is:

You decide how to build this circuit.
Mounting the project
When you are about to mount a project on a PC board, you should always start with the non-active components that are always the resistors and capacitors. In this case we don't have capacitors but we will start with the resistors, then we will proceed with the transistor (the only active component in this circuit).
Once you have the board done, mount R1 first, soldier with a 30 W soldering iron and unleaded soldier. Proceed with the potentiometer and finally with the transistor. Attach some wires to the output of the circuit and soldier the power supply to the input. Watch carefully the polarity of the power supply when soldering to the circuit. Before connecting the power supply revise the circuit and watch for any errors in polarity or connections shorted. When everything is checked you can now safely test the circuit.
Materials
- R1-1 K

- P1-100 K
- Q1-3906 All purpose PNP
- Wires
Back to menu | Led as an indicator of audio
Questions, comments, or suggestions, e-mail me at ChidoDavido82@yahoo.com